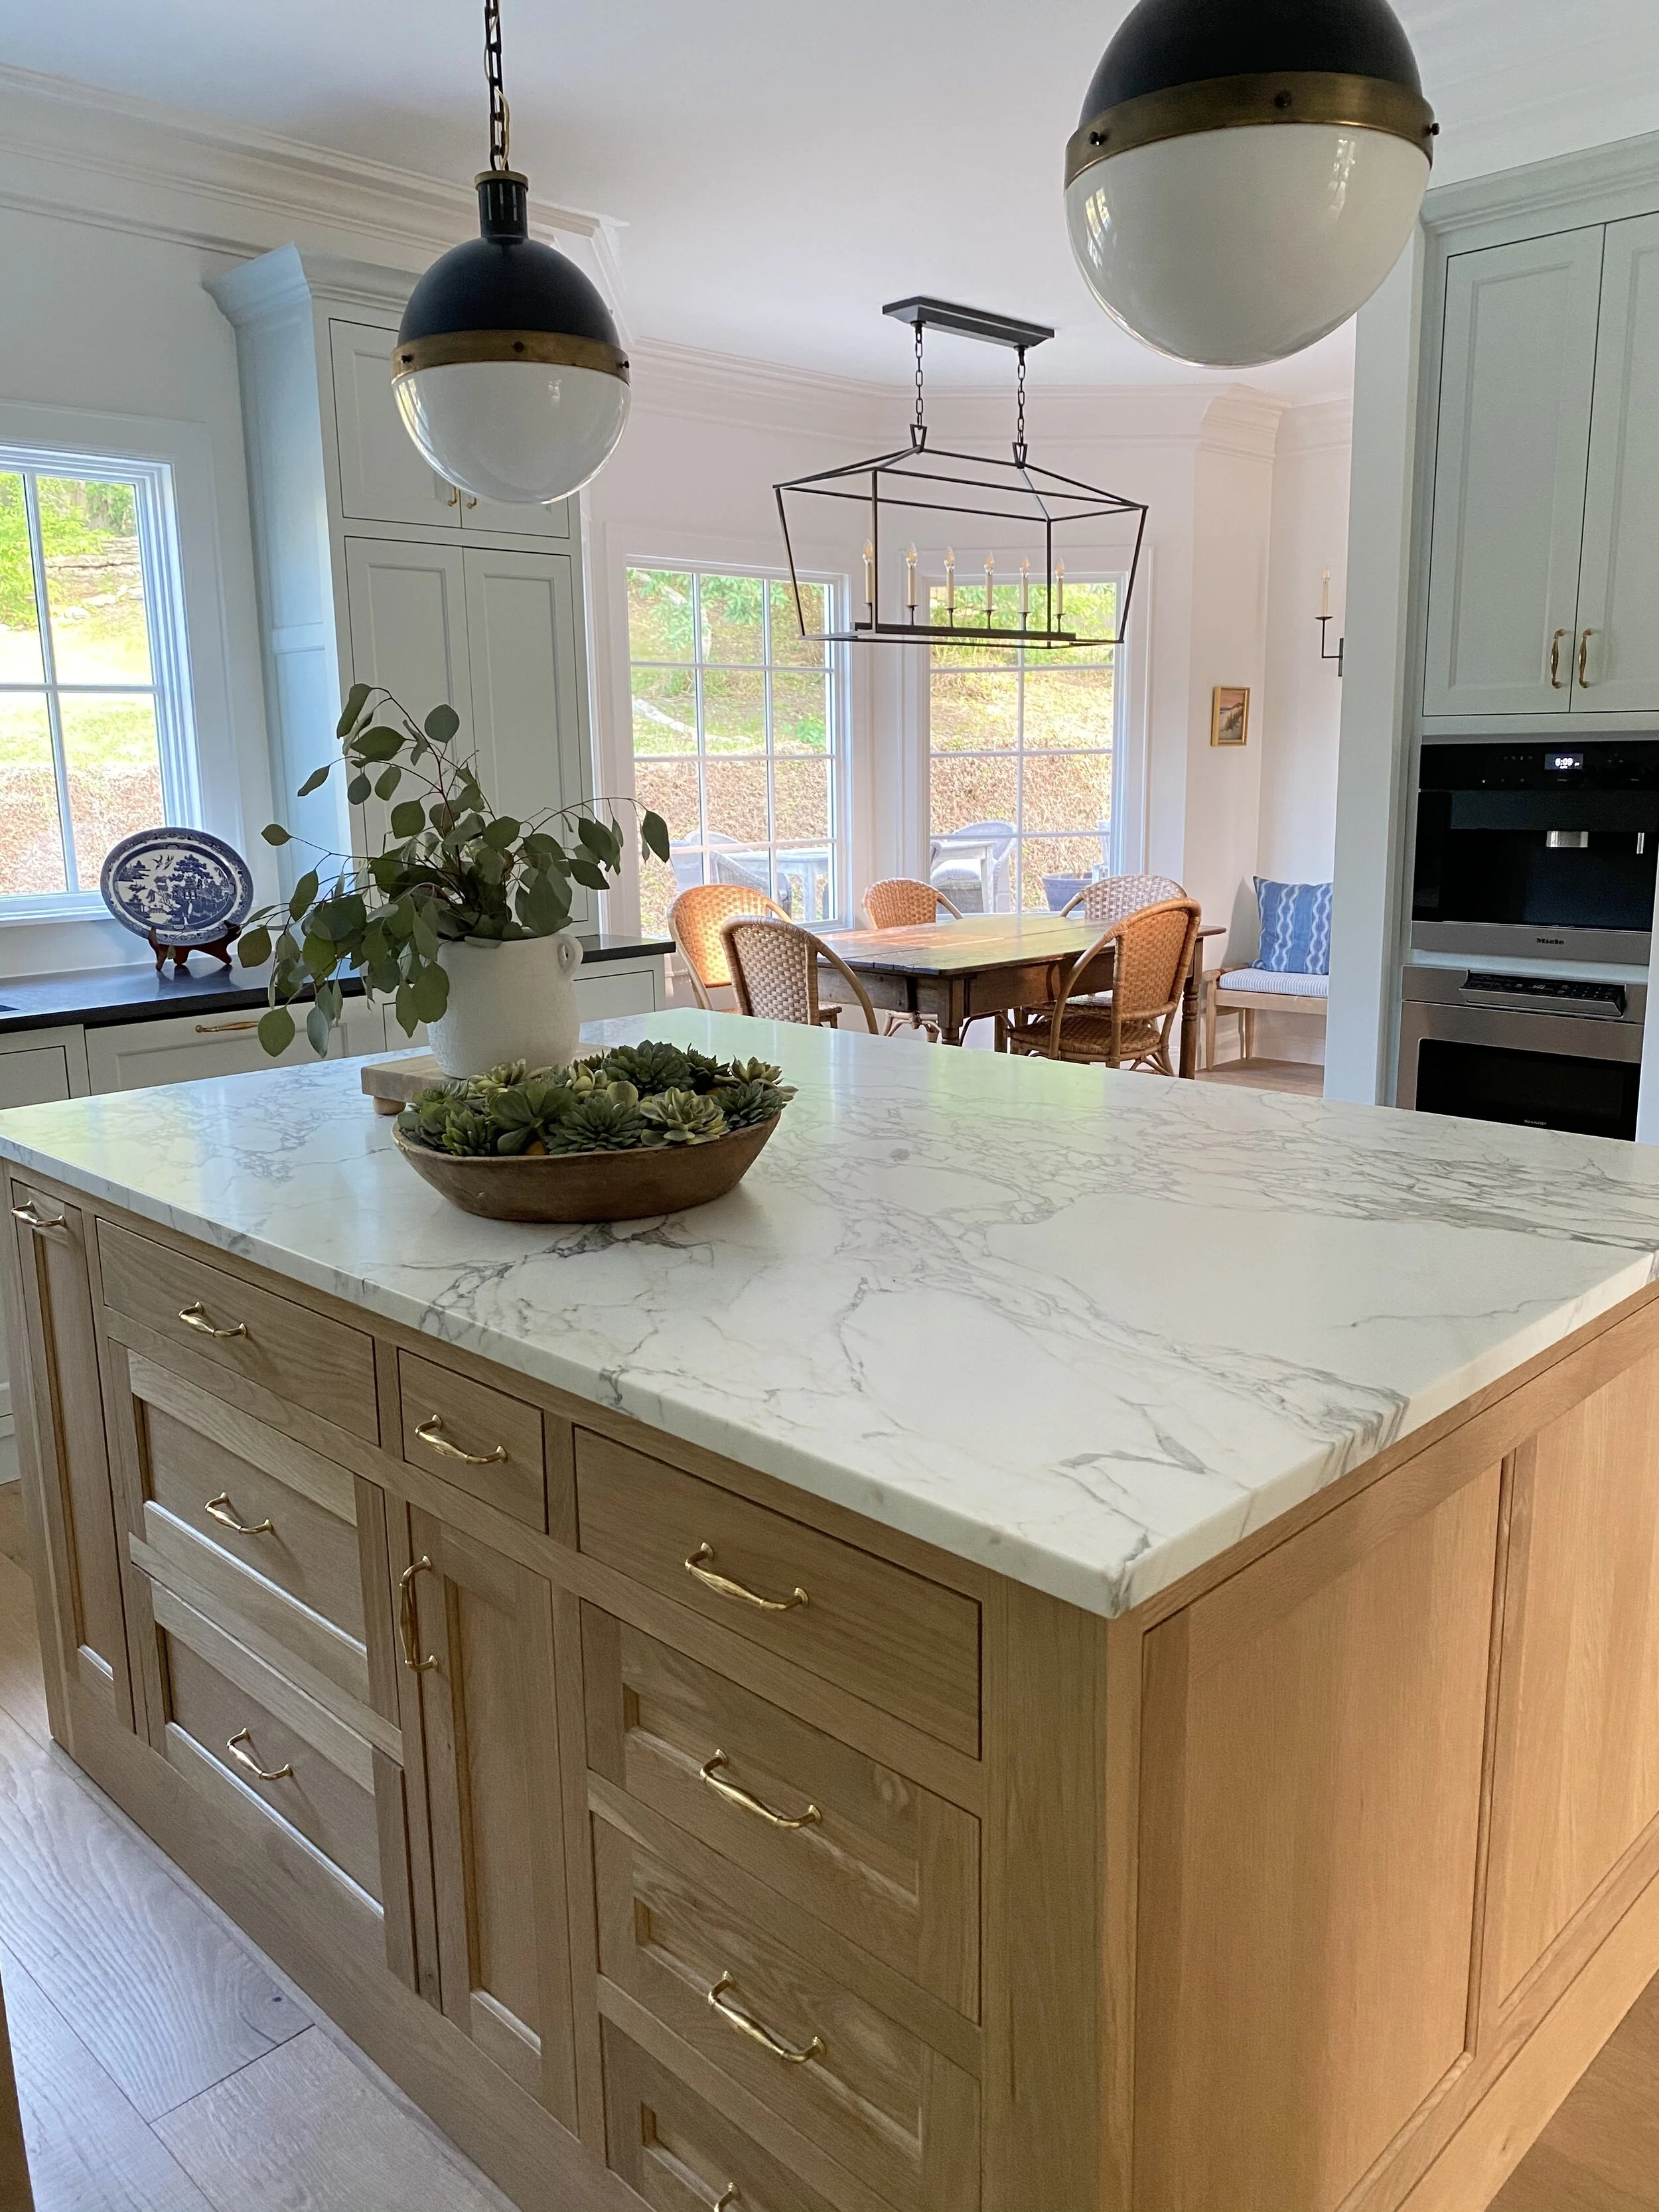
Since we started featuring our kitchen “after” photos on Instagram a couple of months ago, we’ve received lots of great feedback and questions about “Lost Creek Traditional” first floor project. We will keep updating Instagram with our ongoing progress, lots more to come in 2021! Thank you for following along with us!
Wow, this project was a long-time coming and kind of a toughie, since this was my baby. I’ve worked on dozens of client kitchen projects over the years and usually I can see right away the best design for the space and the client. In my own kitchen and first floor areas, major structural changes had to blend seamlessly with all the design goodies I wanted to incorporate into the remodel, all executed in a super short period of time so I could keep my client work moving quickly as well. I obsessed over every tiny detail for months during the planning phase, part of the hazards of the business, knowing there are so many solutions and options available.
Covid-times wore out alllll my patience with our former kitchen situation. And I’m hearing the same from so many of my clients! All the cooking we did in the early months of quarantine helped drive us to really think hard (and fast!) about what we wanted from our dream kitchen. For us the most important thing was to fix the functional plan while also squeezing in as much storage as we could.
We hope our little project diary will walk you through many of the decisions we made along the way - the planning details that were critical to how the project evolved into a well-planned space! Keep reading down the page for our kitchen sources. I am excited to share those with you!
If you’re interested in chatting with us about your project, we’re currently accepting new projects for 2022. We’d love to talk to hear from you! Please visit this link for more information and we’ll reach out to you soon.
Kitchen
Product Links
Countertops - Honed Absolute Black Granite Perimeter and Calacatta Arabescato Island/12” Backsplash with Ledge
before and during - range wall
When we first moved in 8 years ago, we did a very small cosmetic remodel - basically new quartz counters, paint and lighting. The original plan was we would live with the kitchen a while and see where we should go with the renovation. That is always a good plan when you are moving into a new space and plan to live there for a while, since there are often functional things you realize you can’t live without until you live in your home for a bit.
We had awkward angled walls, a tight entry from the garage through our utility room into our kitchen and the tiniest work triangle on the planet in an otherwise pretty good-size space. It seemed like we were constantly working in the same 2’ x 2’ space. So, we squared off the openings into the kitchen, relocated the range out of the island to a focal wall where the refrigerator was before (and added gas! Woohoo!), centered the sink on a new wall with a big window overlooking the backyard, and added a new butler’s pantry where the old kitchen desk and powder room entry were before.
That old kitchen desk was just a junk collector anyway and I always hated how the powder bath was right next to our formal dining room. Now we use every square inch of our kitchen and the designer in me appreciates how taking the time to plan every tiny detail resulted in a great design!
Try not to judge the “before” photos, oh my those are hideous and were taken right before we started packing ;)
DEEP DIVE INTO THE DETAILS
I LOVE my Hicks pendants so we repurposed those for the new design and relocated the wine fridge to the butler’s pantry
I also love our new white oak island design. I’ll share more on this element soon!
Our new 48” range is now roughly where the refrigerator was before, the new 48” Subzero is in the old angled pantry location
We eliminated the corner sink and windows and squared off that cabinetry…makes the kitchen feel so much bigger!!
Notice our crown molding…someone long ago in our home’s history invested in this great triple+ crown molding situation throughout our first floor and we decided to keep it, which was somewhat tricky to match during the remodel but I’m so glad we did. The traditional vibe of the crown helps balance out some of the more modern elements of the design.
before and during - sink wall
DEEP DIVE INTO THE DETAILS
What a breath of fresh air to have 3 windows where a wall of cabinets used to be, 7’ wide including the trim space between the windows! We love our new kitchen sink centered on our view out to the pool. You can see where our old corner windows were walled up.
Like I do with most of our client projects, I decided to use storage towers left and right of the windows (where the outlets are) instead of traditional upper cabinets like we had before. The lower part of the towers where it meets the counter serves as our appliance garages.
We kept our island pendants in the exact same locations, the small pendant over the old sink moved to our new butler’s storage and food pantry
Our new island is 48” x 72” white oak island
Butler’s Pantry and coffee bar
Product Links
Wallpaper
Before and during - pantry wall
DEEP DIVE INTO THE DETAILS
The new food and dish pantry was the old cluttered desk area that was everyone’s dumping ground and apparently an especially scary day in this before picture ;)
We squared off yet another wall and that lower ceiling to the right of the desk area to create a five foot wide pantry that accommodates our serving pieces and food pantry needs in one tidy spot
The new Miele Coffee station is my husband’s absolute favorite thing in the kitchen. Removing the desk area to create a serving wall for guests is a great way to keep our functional work triangle in tact
Before and during - butler’s pantry
This one of the biggest changes we made to our home... and today we revealed our wallpaper installation on Instagram! This butler’s pantry bar area was not originally part of the plan. At the last minute, we took a leap and made the somewhat pain-in-the-budget move to relocate our powder bath entry and plumbing to the former closet under the stairs in order to create this little bar nook between the kitchen and formal dining room. We are so glad we did, it’s one of those special spaces that really adds a custom touch to the remodel as a whole and makes so much more sense for entertaining and our storage needs. Not to mention, the changes really upped the “traditional home” feel of our house. Love!
DEEP DIVE INTO THE DETAILS
We now have a super functional bar staging area with polished brass Waterstone fixtures and antique mirror accents and another area to feature wallpaper!
Mixing antique mirror panels with plain glass allows us to have display areas and hidden storage.
The dark wallpaper and break between our kitchen and formal dining room makes the whole space feel larger overall. A nice surprise!


